How to Use the MachShip Shopify Extension
Overview
Below are frequently asked questions on how to use the MachShip Shopify plugin effectively.
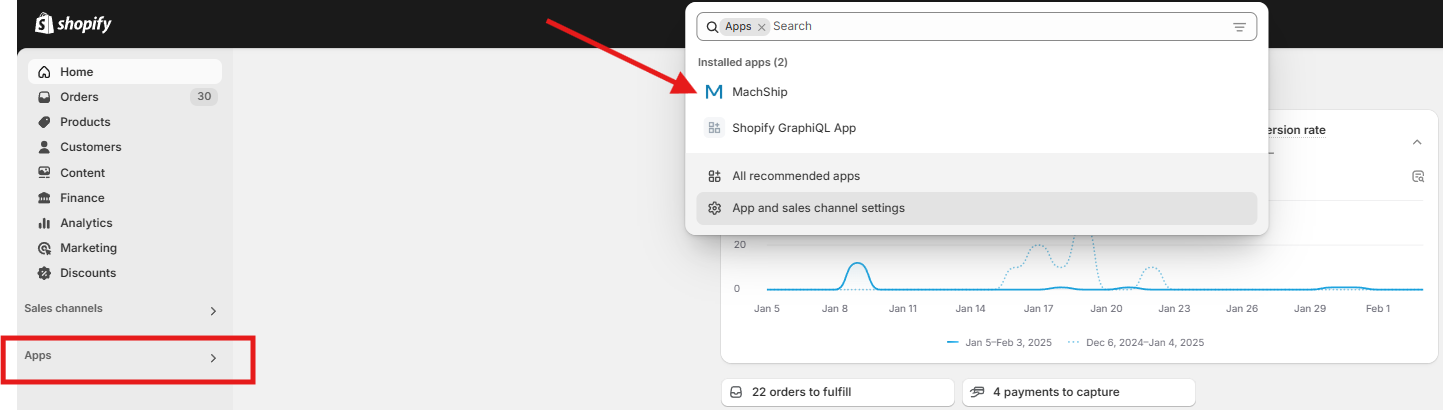
Finding the App UI in Shopify
To locate the MachShip app in your Shopify store:
- Navigate to Apps in the Shopify menu.
- Use the search bar and type MachShip to find and open the app.
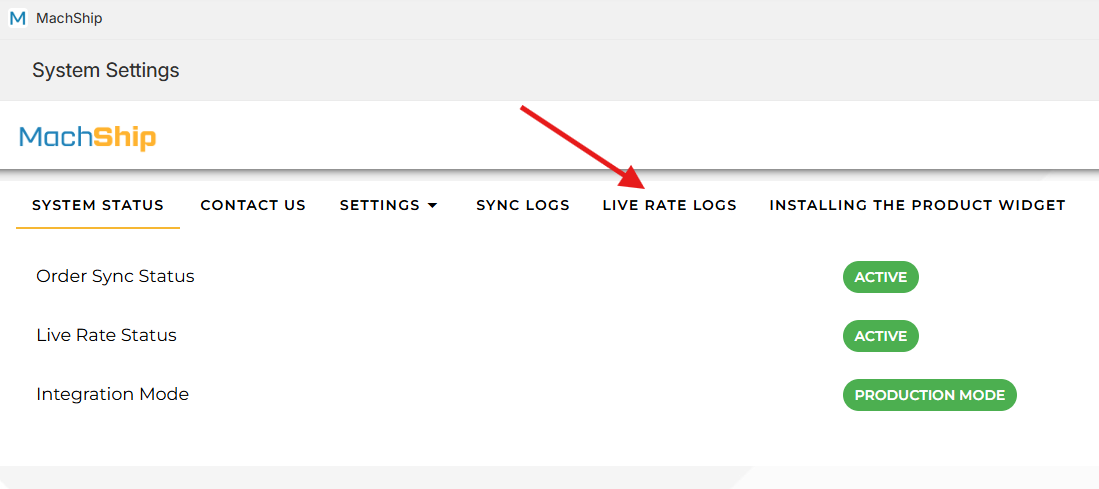
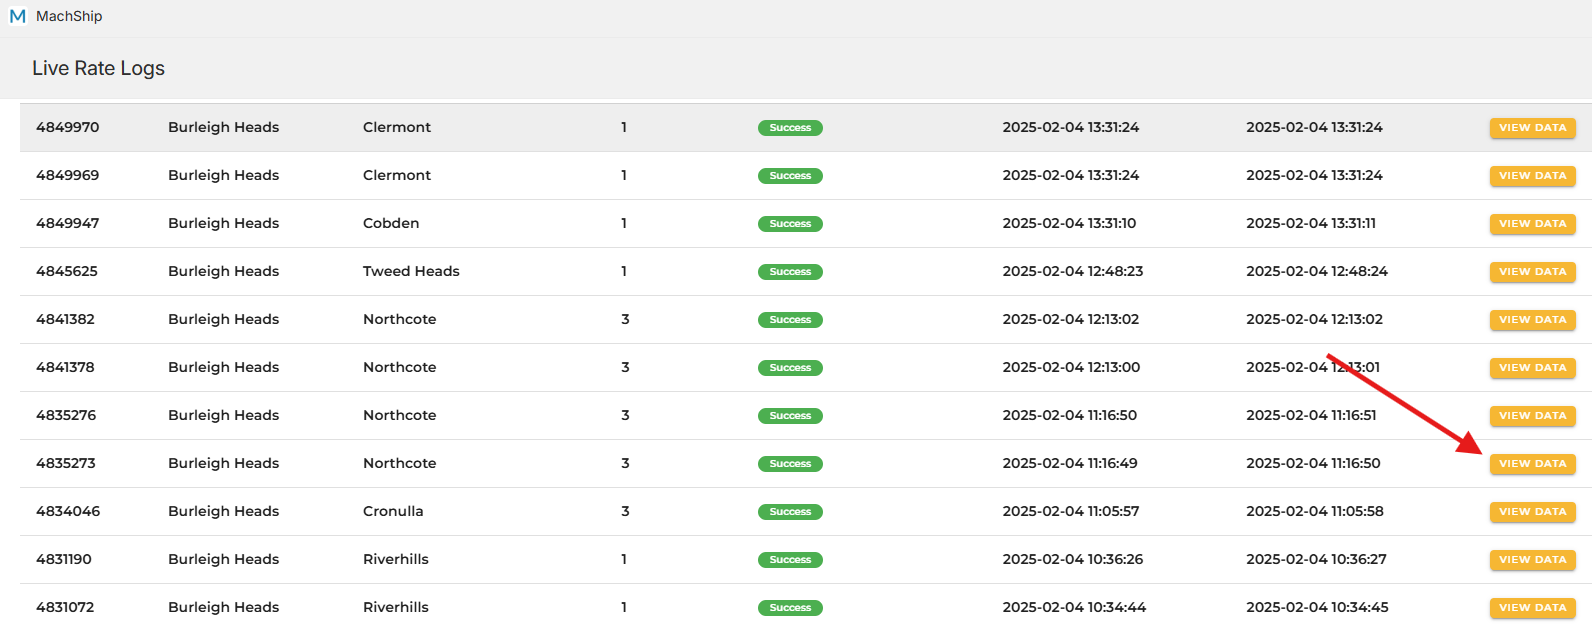
Live Rate Logs
The live rate logs stores a list of every pricing request made in the checkout, and tells you what packages were generated, the carriers that were quoted, and the final price that was returned.
This is very useful when trying to find the cause of issues, or shipping price descrepencies.
To check live rate logs in MachShip:
- Open the MachShip App in Shopify.
- Click on the Live Rates Logs tab to access the logs.
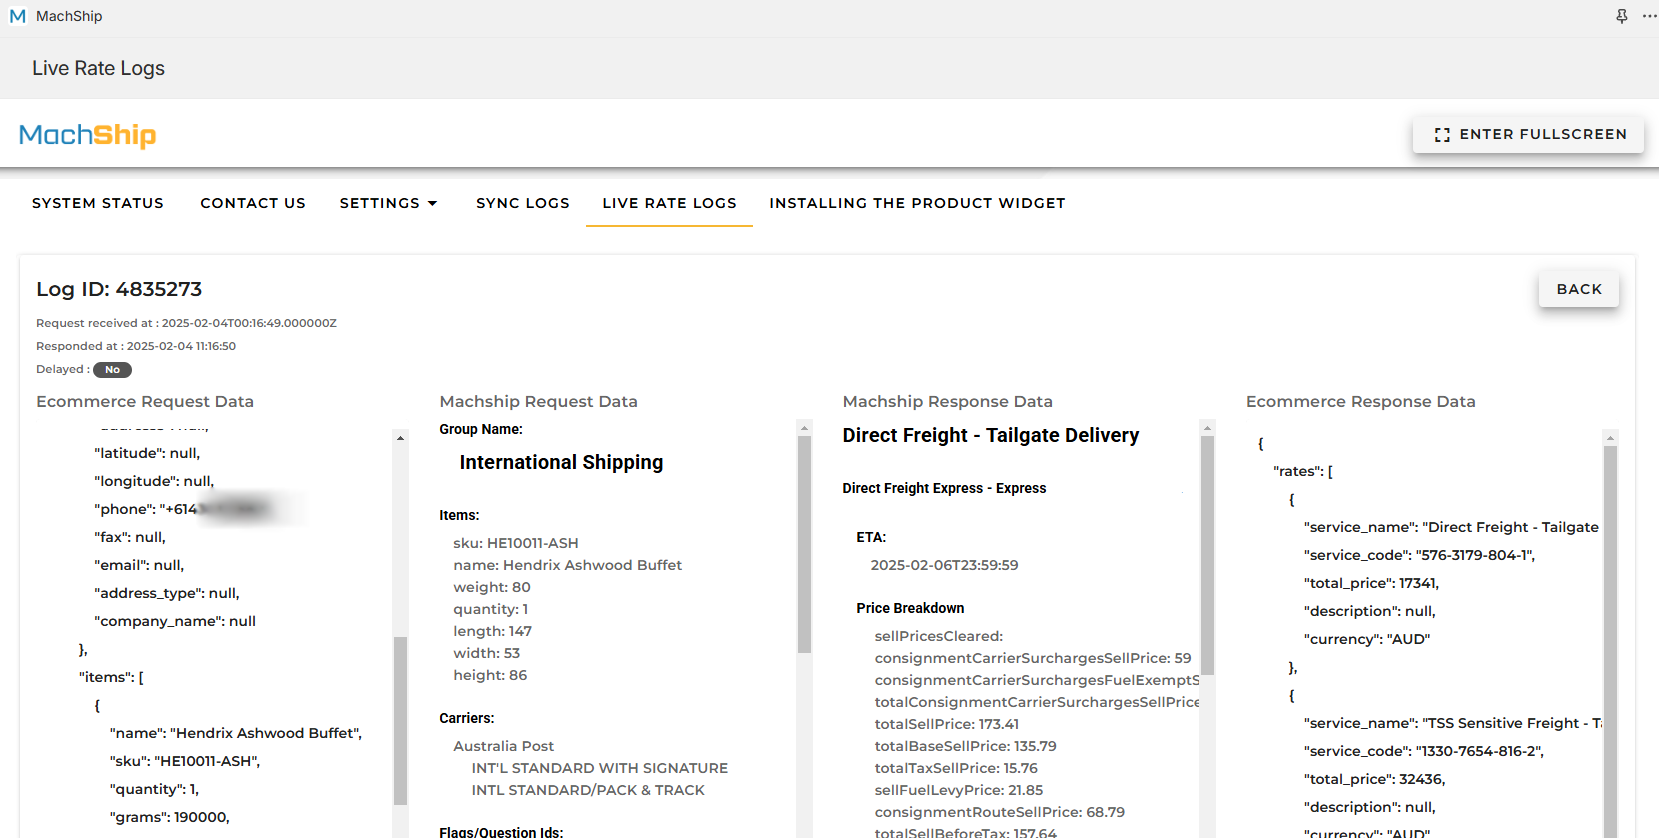
Reading Live Pricing Logs
The Live Rate Logs menu allows you to view all shipping quotes requested by customers on your store.
- To see details for a specific quote, click “View Data” next to the entry.
Inside the log, you’ll find:
- All values received from Shopify.
- Packages Generated
- Shipping Options & Surcharges Applied
- Rates returned by MachShip.
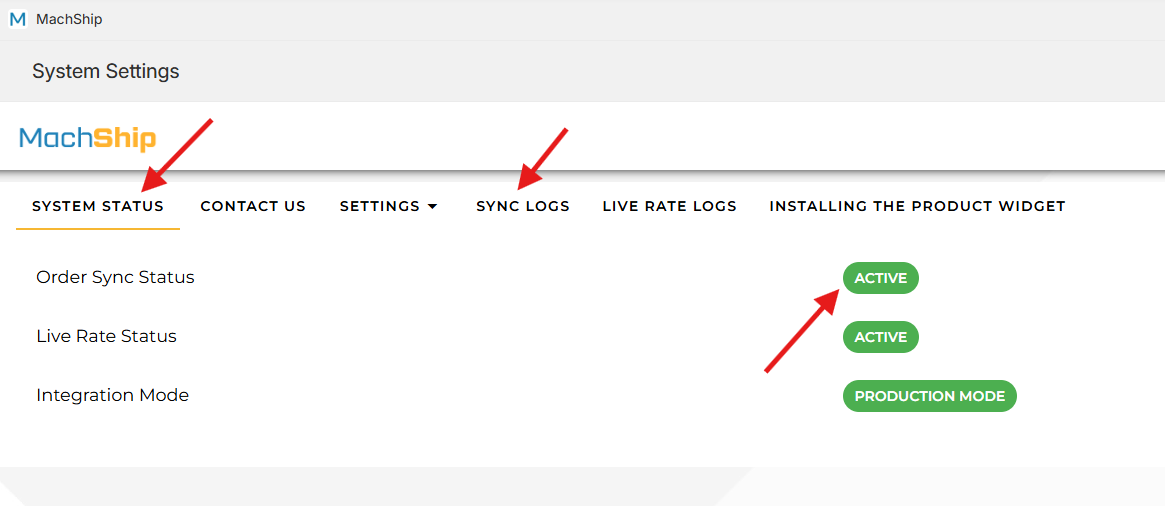
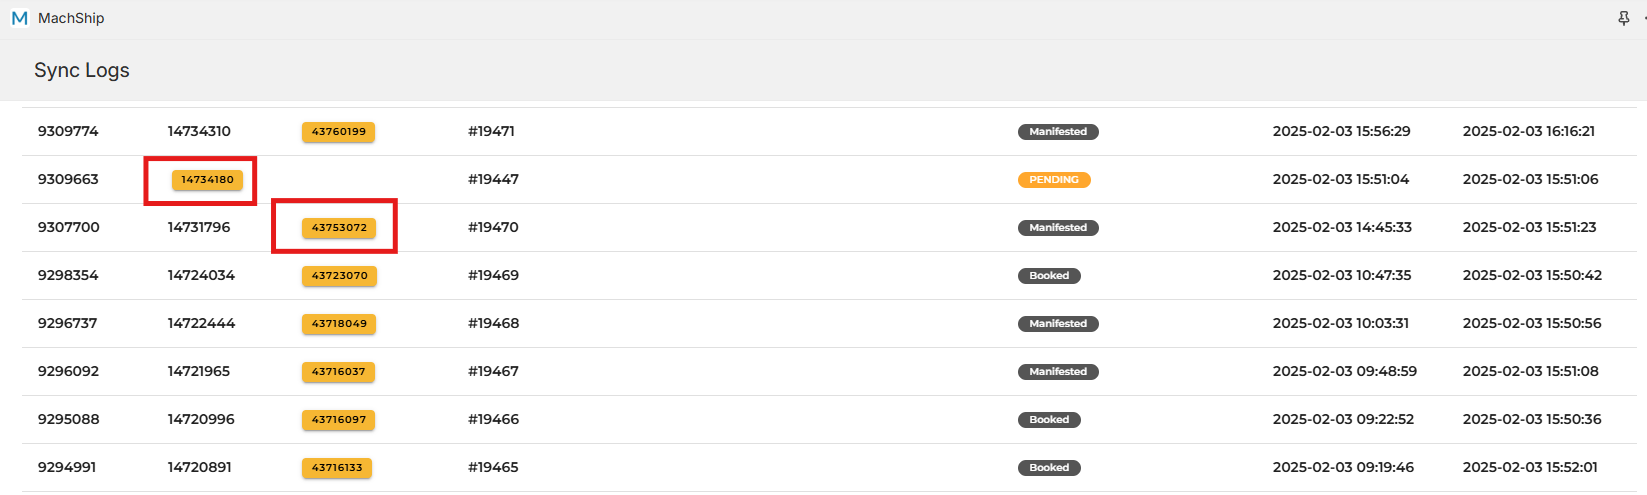
Order Syncing Logs
To track synced orders from Shopify to MachShip:
- If Order Syncing is active on your integration, the SYNC LOGS option will appear in the menu.
Under SYNC LOGS, you can view:
- All synced orders.
- Click on a Pending ID or Consignment ID to view details in MachShip.
Live Rate Configurations
This section explains how to configure Live Rate Settings within the MachShip Shopify App. Each setting can be tailored using labels, descriptions, surcharges, and conditional logic that responds to live rate requested on the checkout page.
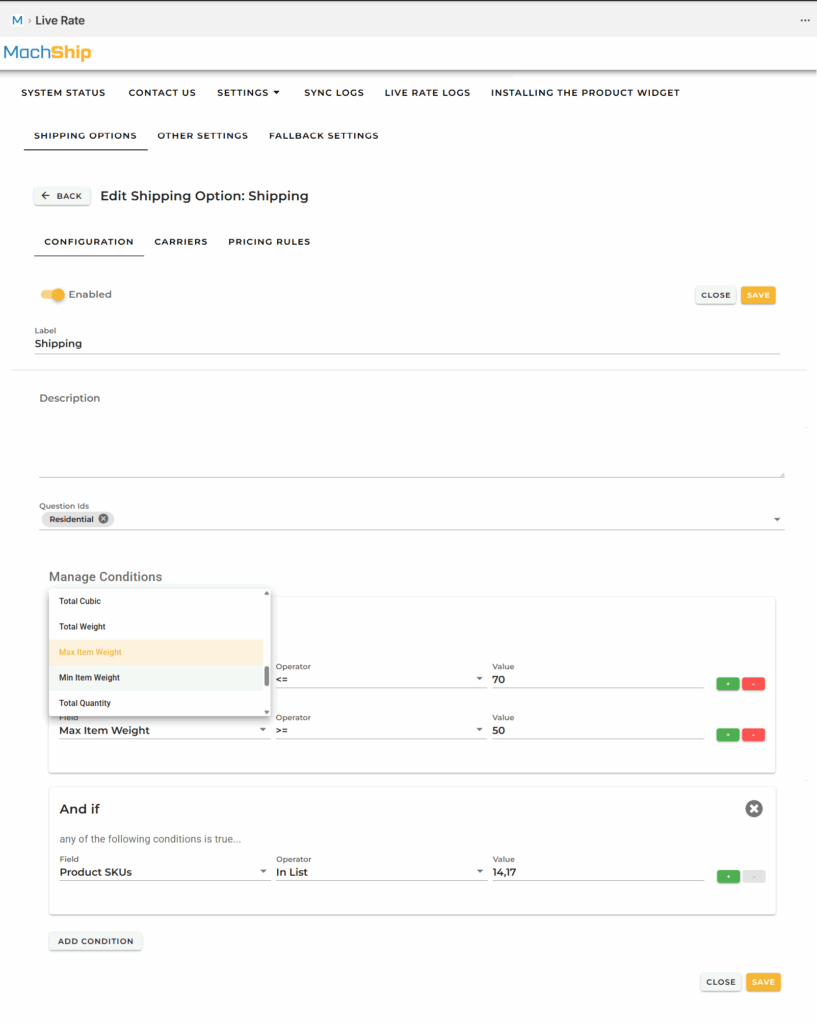
These same configuration elements are used when creating or editing a Shipping Option, and within its Configuration, Carriers, and Pricing Rules sections. Here is a short explanation on each option you can find to use to set the conditions you want.
| Field / Setting | Explanation |
| Label | Name that appears for the setting. For shipping options, this is displayed at checkout. |
| Description | Text describing the setting. For shipping options, shown under the label at checkout. |
| Question ID | Links a surcharge to the setting. Must match a valid MachShip surcharge ID. |
| Manage Conditions | Determines when the setting applies. Each condition includes a Field, Operator, and Value. Multiple rules can be combined. |
| Fields – MachShip: fromLocationId | Sender location ID. |
| Fields – MachShip: fromAddressLine1 | First address line of the sender. |
| Fields – MachShip: fromAddressLine2 | Second address line of the sender. |
| Fields – MachShip: fromLocation.suburb | Sender suburb. |
| Fields – MachShip: fromLocation.postcode | Sender postcode. |
| Fields – MachShip: toLocationId | Recipient location ID. |
| Fields – MachShip: toAddressLine1 | Recipient address line one. |
| Fields – MachShip: toAddressLine2 | Recipient address line two. |
| Fields – MachShip: toLocation.suburb | Recipient suburb. |
| Fields – MachShip: toLocation.postcode | Recipient postcode. |
| Fields – MachShip: carrierIds | Carrier IDs returned in MachShip quote response. |
| Fields – MachShip: questionIds | Surcharge question IDs returned in quote response. |
| Fields – Order: Product SKUs | SKU codes of all line items in the order. |
| Fields – Order: Product Names | Names of products in the order. |
| Fields – Order: Product itemTypes | Shopify item types for all products in the order. |
| Fields – Order: Total Cubic | Total cubic volume after packing. |
| Fields – Order: Total Weight | Total weight of the order. |
| Fields – Order: Max Item Weight | Weight of the heaviest item in the order. |
| Fields – Order: Min Item Weight | Weight of the lightest item in the order. |
| Fields – Order: Total Quantity | Total number of items in the order. |
| Fields – Order: Total Price | Total order value. |
| Fields – Order: Address Is PO Box | True if the shipping address is a PO Box. |
| Fields – Request Data: Request Data Payload | Full MachShip rate request payload (advanced use). |
| Fields – Request Data: Request Data Field | Specific key extracted from payload (advanced use). |
| Operators: Is True | True for boolean fields. |
| Operators: Is False | False for boolean fields. |
| Operators: In List | Matches any value in a comma-separated list (e.g., A,B,C). |
| Operators: Not In List | True when the value is not in the list. |
| Operators: Contains | True if the field contains the provided value. |
| Operators: Not Contains | True if the field does not contain the value. |
| Operators: Regex | Uses a regular expression for pattern matching. |
| Value Formatting | Multiple values must be comma-separated with no spaces (e.g., 1,2,3). |
| Condition Logic: + icon | Adds an OR rule. Any rule in this group can satisfy the condition. |
| Condition Logic: Add Condition | Adds an AND rule. All rules must be true for the condition to apply. |
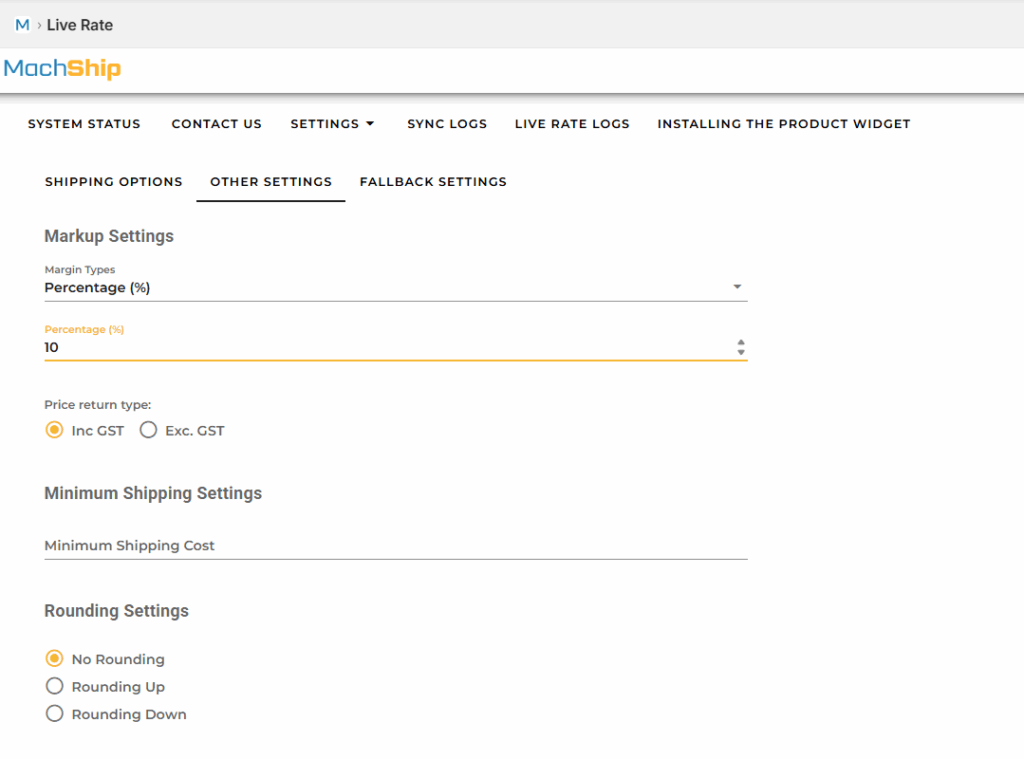
Overall Margins
Rather than, or as well as, setting mark ups on your shipping options, you can also add them to all at once using the overall margins setting.
Note, if you apply a shipping option and overall margin, both the amounts will be applied.
- Go to Settings.
- Click on Live Rate > Other Settings.
- Modify the margins as required.
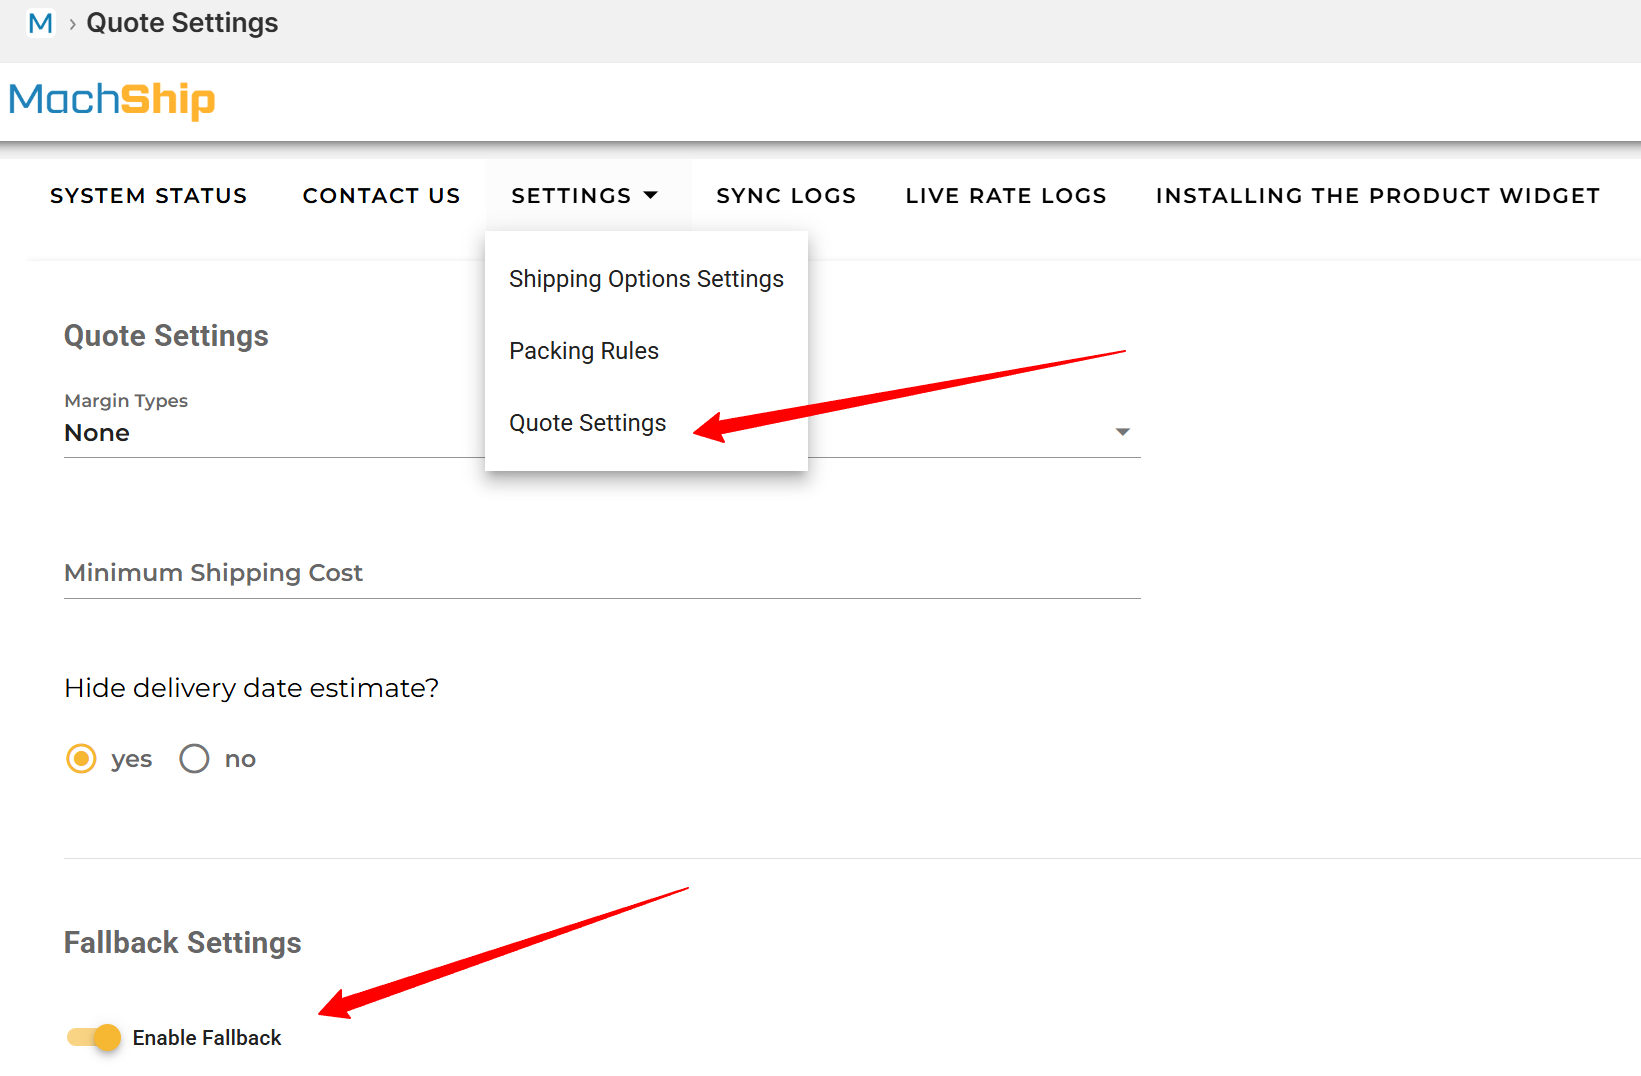
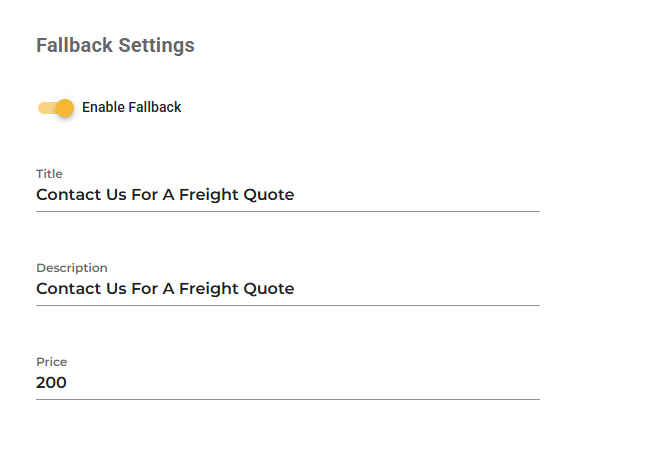
Fallback Settings
What is the Purpose of Fallback Settings?
Fallback is the name of the shipping option that is displayed to a user if there is any type of error in generating a price.
Common examples would be if an incorrect postcode is entered or no carrier rates are available.
- If enabled: A custom fallback rate (with a name and price of your choice) will be displayed.
- If disabled: Shopify will show “No shipping options available.”
There is, at the time of writing this, no way to display the error to the user other than as a shipping method.
How to Configure Fallback Settings:
- Navigate to Settings > Quote Settings > Fallback Settings.
- Toggle the fallback option ON or OFF.
- Customize the fallback name and price as needed.